
step-by-step guide for starting home map work. I’ll cover two common meanings of “home map” so you can pick what you need:
- Floor plan / layout map (for renovation, furniture planning, real-estate listings), and
- Emergency / evacuation map (escape routes, meeting points, safety info).
A — Quick checklist (what you’ll need)
- Tape measure (or laser measure)
- Graph paper or blank paper + pencil (or a phone/tablet)
- Phone with camera (optional: LiDAR-capable iPhone for scanning)
- Ruler / scale (or an app)
- Apps: magicplan / Home Planner / Floor Plan Creator / Canva / Planner 5D (options below). magicplan+2homeplannerapp.com+2
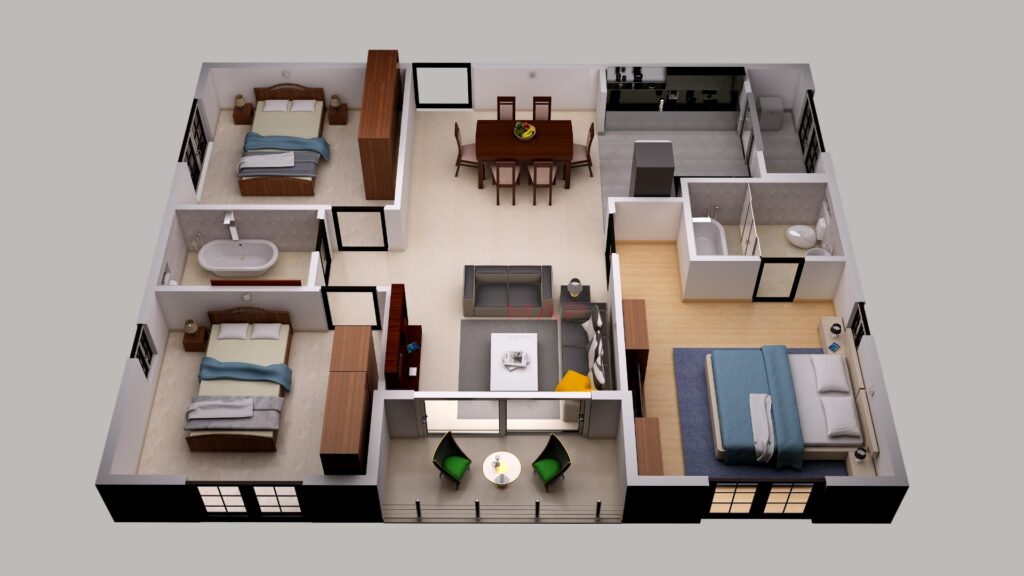
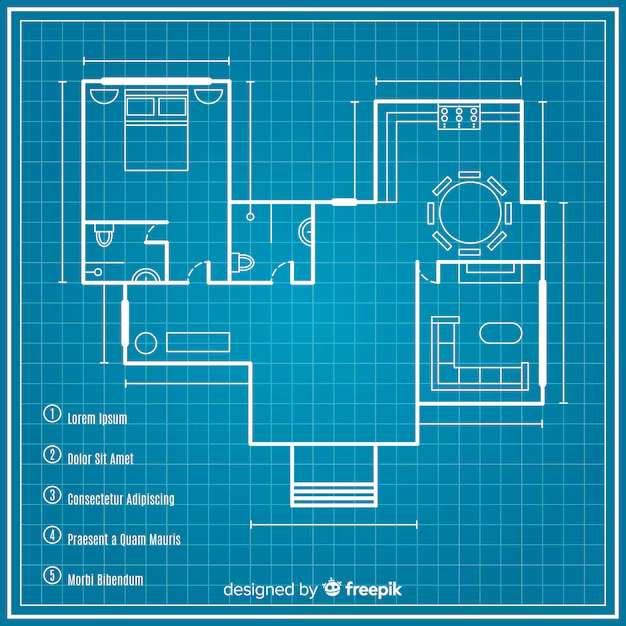
B — Step-by-step: make a simple floor plan / home map (manual → digital)
- Decide the area & purpose
- Whole house, one floor, or a single room? Purpose: renovation, furniture layout, sale listing, or measuring for new items? (This affects detail level.) smartdraw.com
- Measure carefully
- Measure exterior walls first, then each room. Record wall lengths, door widths, window sizes, ceiling heights, and fixed appliances (boiler, stove, etc.). Measure door swing direction. Use a laser measure for speed/accuracy if available. Plan7Architect
- Choose a scale
- Common small-scale choices: 1:50 (1 cm = 50 cm) or 1:100 for whole houses. If drawing on graph paper, decide how many squares = 1 meter. smartdraw.com
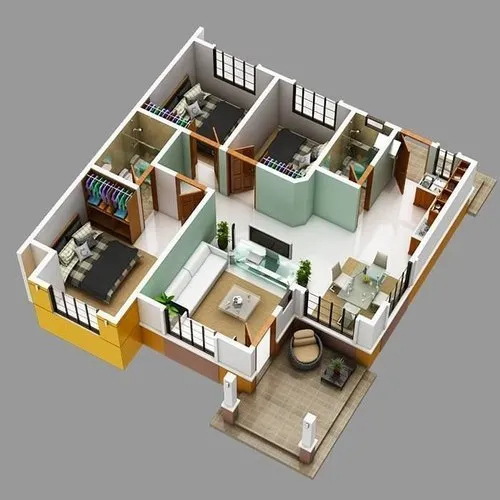
- Draw outer walls and internal walls
- Start with the perimeter, then add interior walls to scale. Mark structural elements (columns, beams) and note load-bearing walls. LiveHome3D and SmartDraw show the standard workflow. www.livehome3d.com+1
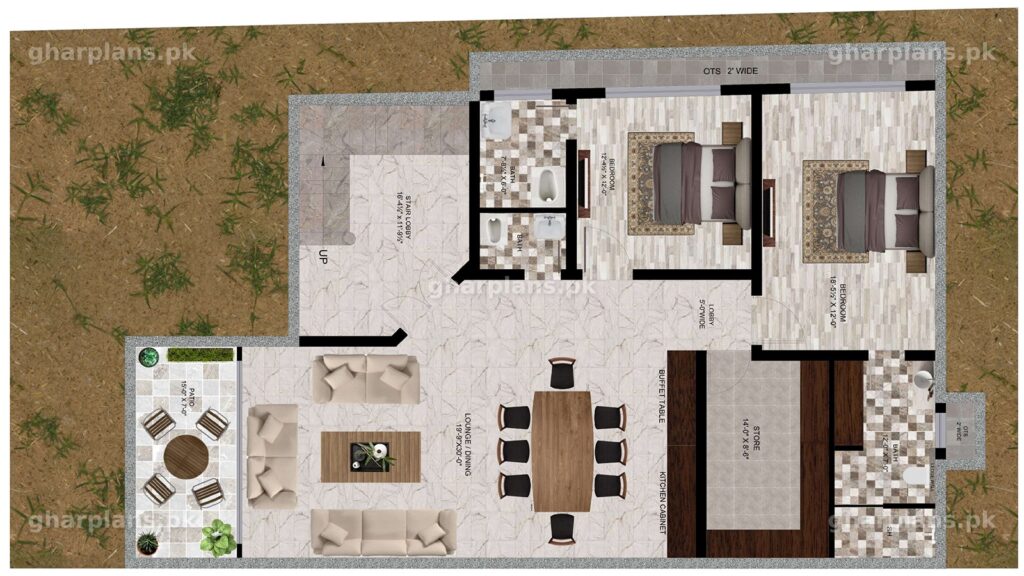
- Add doors, windows, and fixed features
- Place them to scale (show door swings). Add kitchen appliances, bathroom fixtures, stairs, fireplaces.
- Add furniture and circulation
- Either sketch furniture to scale or cut paper templates and move them around to test layouts. Leave 60–90 cm clearances for walkways where possible.
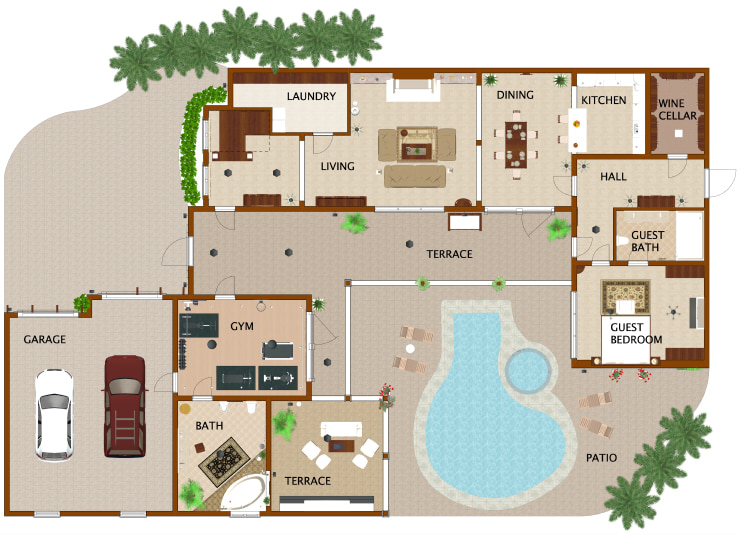
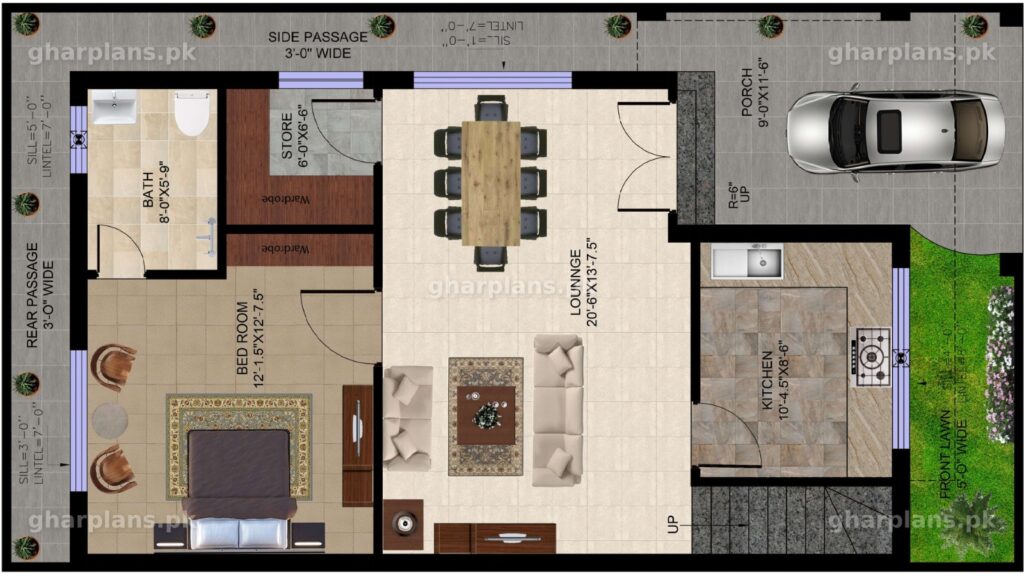
- Add dimensions and labels
- Mark key distances (room lengths, door widths). Label rooms (kitchen, master bedroom, etc.). This makes plans usable by contractors or realtors. www.livehome3d.com
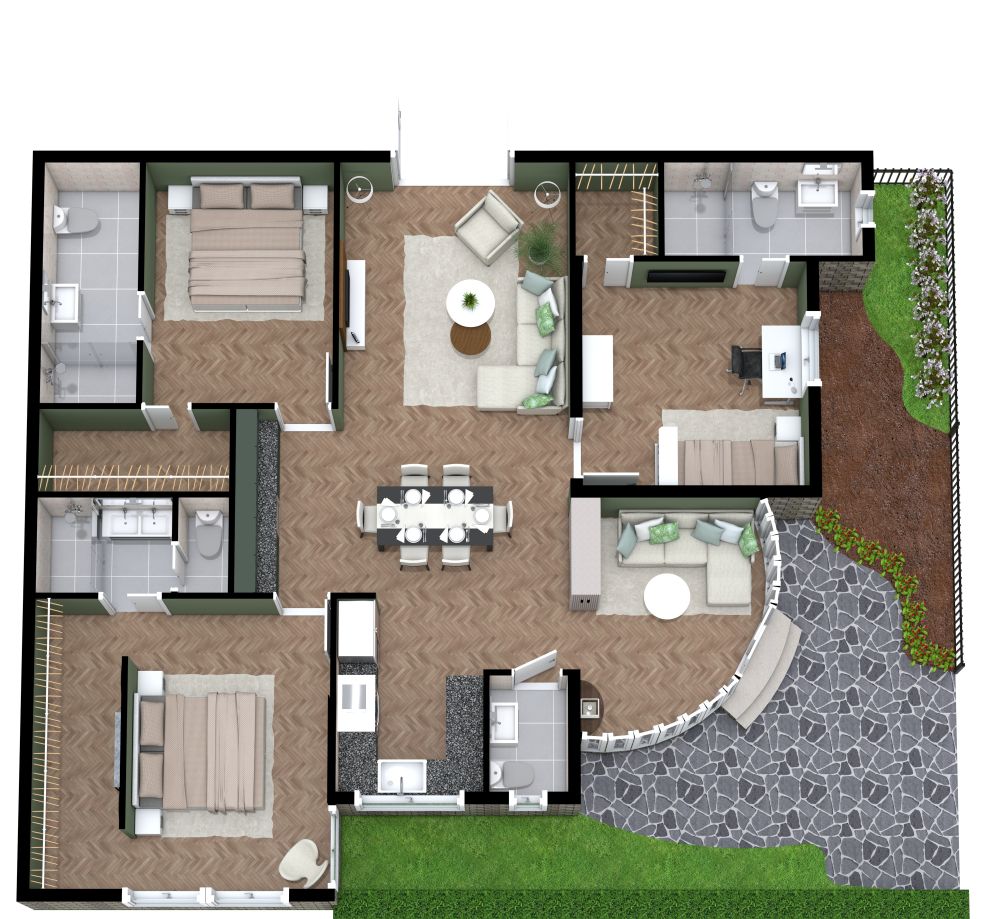
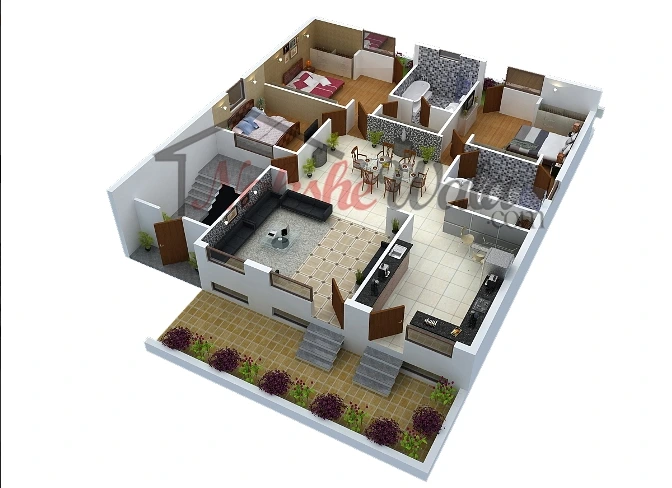
- Digitize (optional but recommended)
- Scan a clear photo or recreate in an app:
- magicplan — quick phone scanning and instant floor plans. magicplan
- Home Planner / AR room scanners — point your phone to auto-create 2D/3D plans (great if your phone supports LiDAR). homeplannerapp.com
- Canva / FloorPlanCreator / Planner 5D — simple drag-and-drop editors and templates for presentation/export. Canva+2floorplancreator.net+2
- Scan a clear photo or recreate in an app:
- Export & share
- Export to PDF/JPG/CAD as needed. For contractors, provide scaled PDF and a notes summary (materials, existing conditions).
- Double-check on site
- Walk the home with the plan and verify measurements before buying materials or starting construction.
C — Step-by-step: create an emergency/evacuation home map
- Draw a simple floor plan (use the steps above but keep it simple).
- Mark primary & secondary exits for every room (doors & windows usable for escape).
- Choose two evacuation routes from each sleeping area (if one exit is blocked).
- Mark a safe meeting point outside (e.g., mailbox or corner of the street).
- Add emergency contact info (phone numbers, address for first responders).
- Practice the plan with household members; do at least one drill every 6 months. For templates and printable evacuation maps, tools like Evacuation-Planner and Red Cross resources are useful. evacuation-planner.com+1
D — Recommended apps & when to use them
- magicplan — fast on-site scanning and professional exports (great for contractors/estimates). magicplan
- Home Planner / AR room scanner — if you want accurate 2D/3D automatically from your phone camera (best with LiDAR). homeplannerapp.com
- Floor Plan Creator / FloorplanCreator.net — easy 2D/3D viewing and print to scale. floorplancreator.net+1
- Canva — quick, attractive floor plan templates for sharing or listing. Canva
- SmartDraw / LiveHome3D / Planner 5D — more full-featured design apps for detailed plans and visuals. www.livehome3d.com+2smartdraw.com+2
E — Pro tips & common pitfalls
- Measure twice, draw once — small measurement errors multiply.
- Note ceiling heights and slopes — that matters for storage and HVAC.
- For renovation work, confirm load-bearing walls with a pro before removing anything.
- If sharing with contractors, provide both scaled digital files and a printed copy.
- Keep one simple evacuation map on the fridge for emergencies.